Recently, in WordPress.com, we launched a new local development environment tool called Studio. It allows creating local WordPress sites and sharing them with clients for review.
Sharing those demo sites is an excellent feature, but it can’t replace the ability to synchronize the local Studio site with a WordPress.com site. As such a feature is not available yet, I used GitHub deployments feature released earlier this year to hook Studio with WordPress.com. See how you can use both together.
Create a Studio site
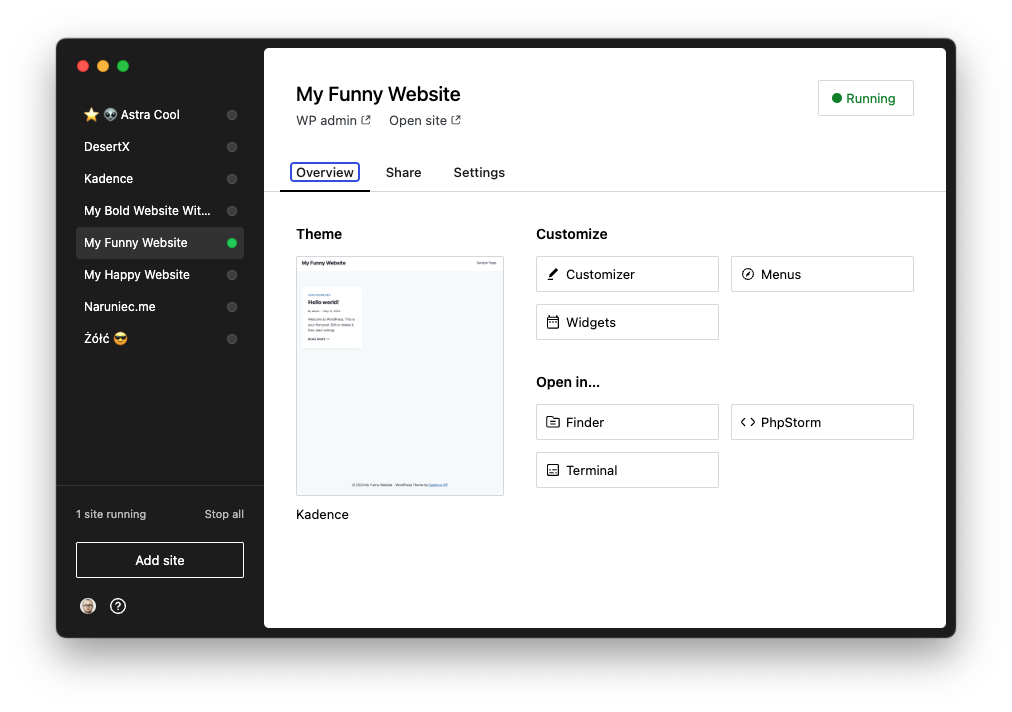
First, download Studio, install it, and create a site. Install some plugins and a custom theme, and maybe use something you developed recently. See how my test site with a Kadence theme looks in Studio:
Create a GitHub repository
When your local Studio site is ready, create an empty GitHub repository. This can be either Public or Private and will be used to hook your local Studio site with WordPress.com.
Push the site to the repository
Now, push the Studio site code to the newly created repository. GitHub deployments allow setting up deployments granularly, separately for each plugin and theme, but to mimic the basic development project flow, let’s plan to keep the whole wp-content/ in the repository.
See the detailed steps below:
1. Open the Studio site in Terminal and init the Git repository
Initialize local Git repository inside wp-content/.
1. In the Studio site’s Overview tab, click Open in -> Terminal
2. Change the directory to wp-content and initialize Git repository:
cd wp-content
git init
4. Create a .gitignore file, and using your editor, add the following content:
.DS_Store
db.php
mu-plugins
database
5. Add and commit all changes:
git add .git commit -m "Initial commit"6. Add a new repository as a remote:
git remote add origin git@github.com:USER/REPOSITORY.git7. Push to the remote repository:
git push origin master2. Create a site with a Creator plan
The GitHub deployments feature is available for WordPress.com Creator and Entrepreneur plans, so ensure you have a WordPress.com site with one of those plans before proceeding. Of course, you can use a staging site for such a site to avoid testing on production.
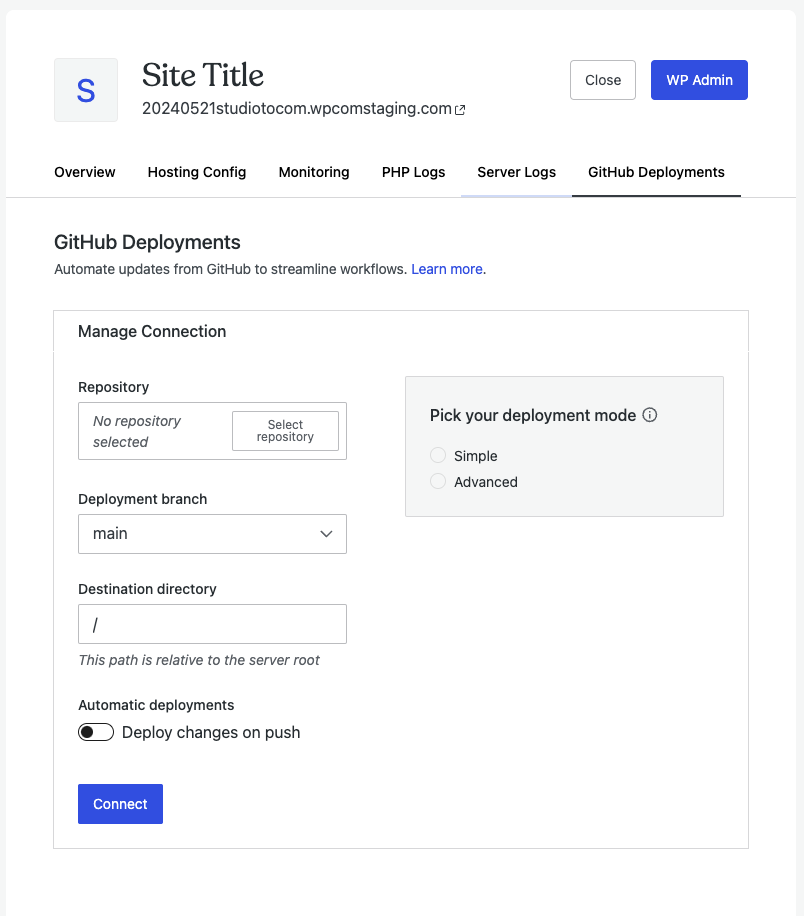
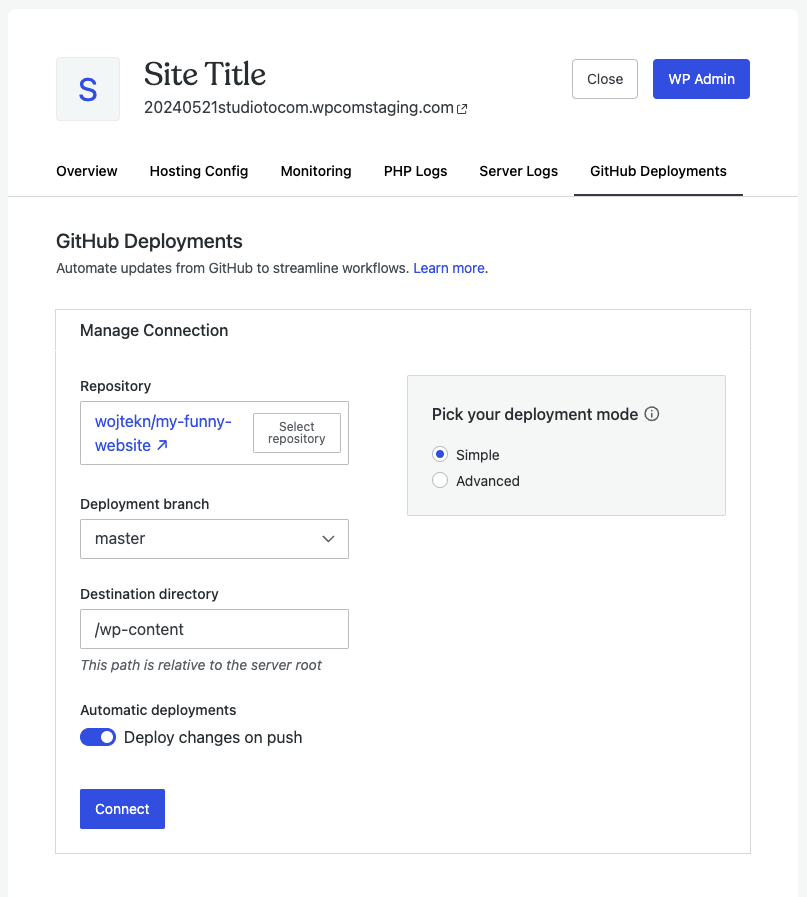
3. Set up GitHub deployments
- Navigate to your WordPress.com Site -> GitHub Deployments
- Connect your GitHub account if needed
- Select the repository
- Leave the default ‘Deployment branch’
- Leave the default value of ‘Destination directory’, which is
/wp-content - Enable ‘Automatic deployments’
- Save
- Use the three-dots menu and trigger an initial deployment
That’s it! Now, you can navigate to WP Admin and confirm that plugins and themes exist. Note that this only deploys the code, so you will need to manually activate plugins and themes and synchronize any changes made in WP Admin.
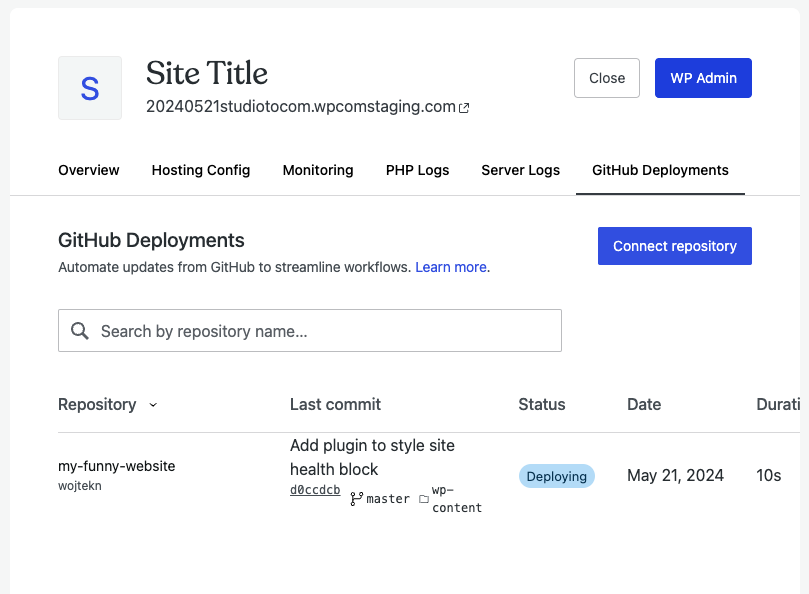
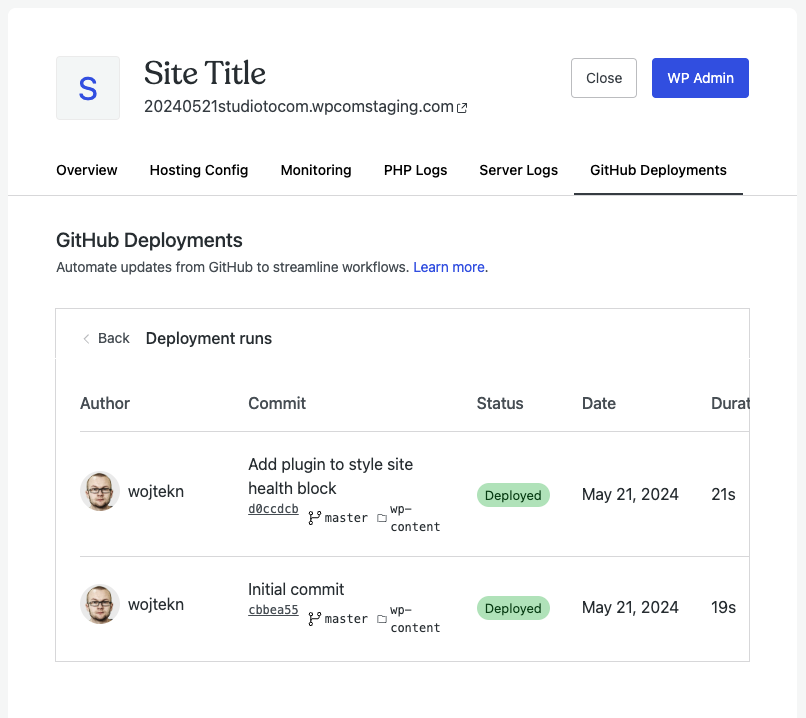
4. Continuous development
With Automatic deployments enabled, any subsequent commit pushed to the repository will be automatically deployed to the site. See how it looks after pushing another commit to the repository:
Further reading
This is just a basic flow, and the GitHub Deployments feature allows setting up much more complex flows, e.g., deploying each plugin and theme from its own GitHub repository or using Composer as one of the build steps.
Check the docs to learn more about GitHub Deployments and Studio, and share any questions or feedback you have.
Leave a Reply